In this Premiere Pro Tutorial, I’m going to teach you a background mask transition that is sure to delight those that see it. As a reference to what the transition is, go to the: 23-second mark in the video version of this tutorial above this paragraph. This tutorial will follow a slightly different format than the video and will provide those who prefer learning via written word an opportunity to add a new trick to their arsenal.
Now that you’ve seen the effect we’re going to create let’s get into it.
Step 1: Shoot your subject doing the exact same thing
For this particular effect you’re going to need to remember one thing: when you’re filming, make sure to shoot your participant in two—or as many locations as you want—doing the exact same thing. A few examples would be jumping, twirling, running, or most simple activities. The effect can be done with more complex actions like playing sports, martial arts, extreme tricking and the like, but remember that this will make the effect harder to pull off because the participant has to do the exact same thing with the same timing.

Pro Tip: One thing that can help is actually using the gridlines on your camera screen to make sure your subject is in the exact same place both times.
Step 2: Create a Mask
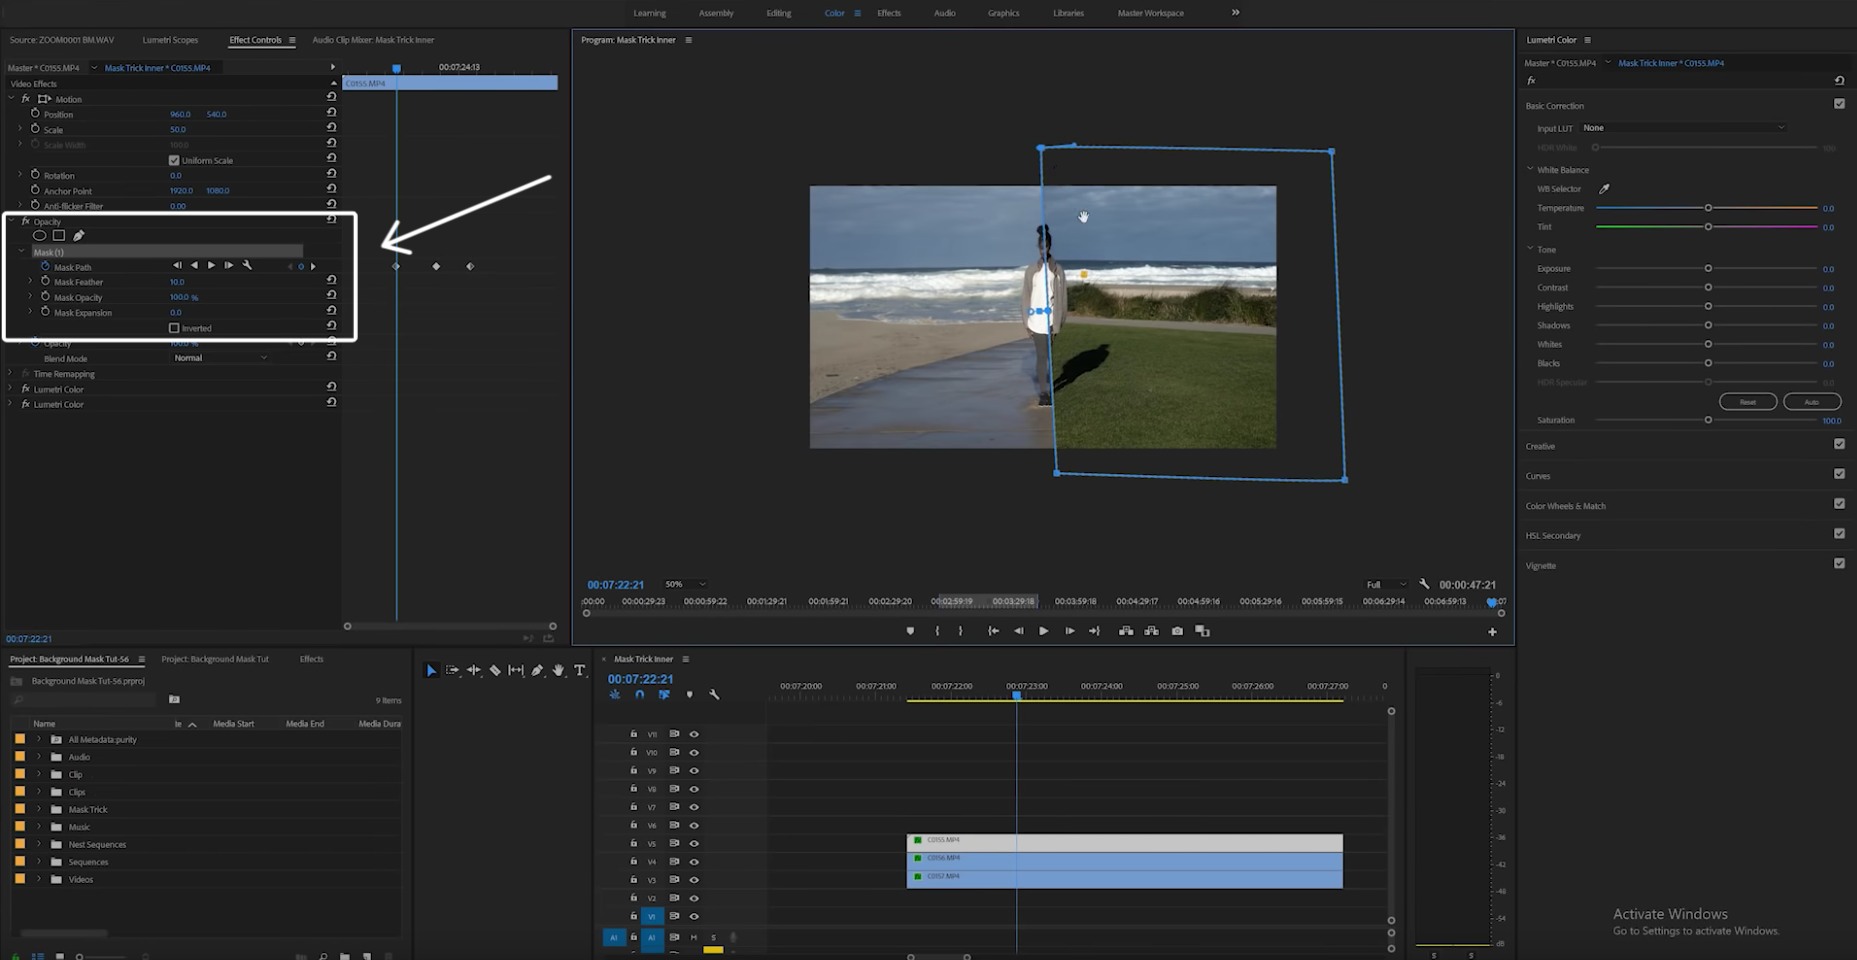
Now that you have your footage go into Opacity and mask that effect. You do that by going into the pen tool and drawing a shape over your footage (1:16 in the video tutorial).
Step 3: Keyframe the Shape
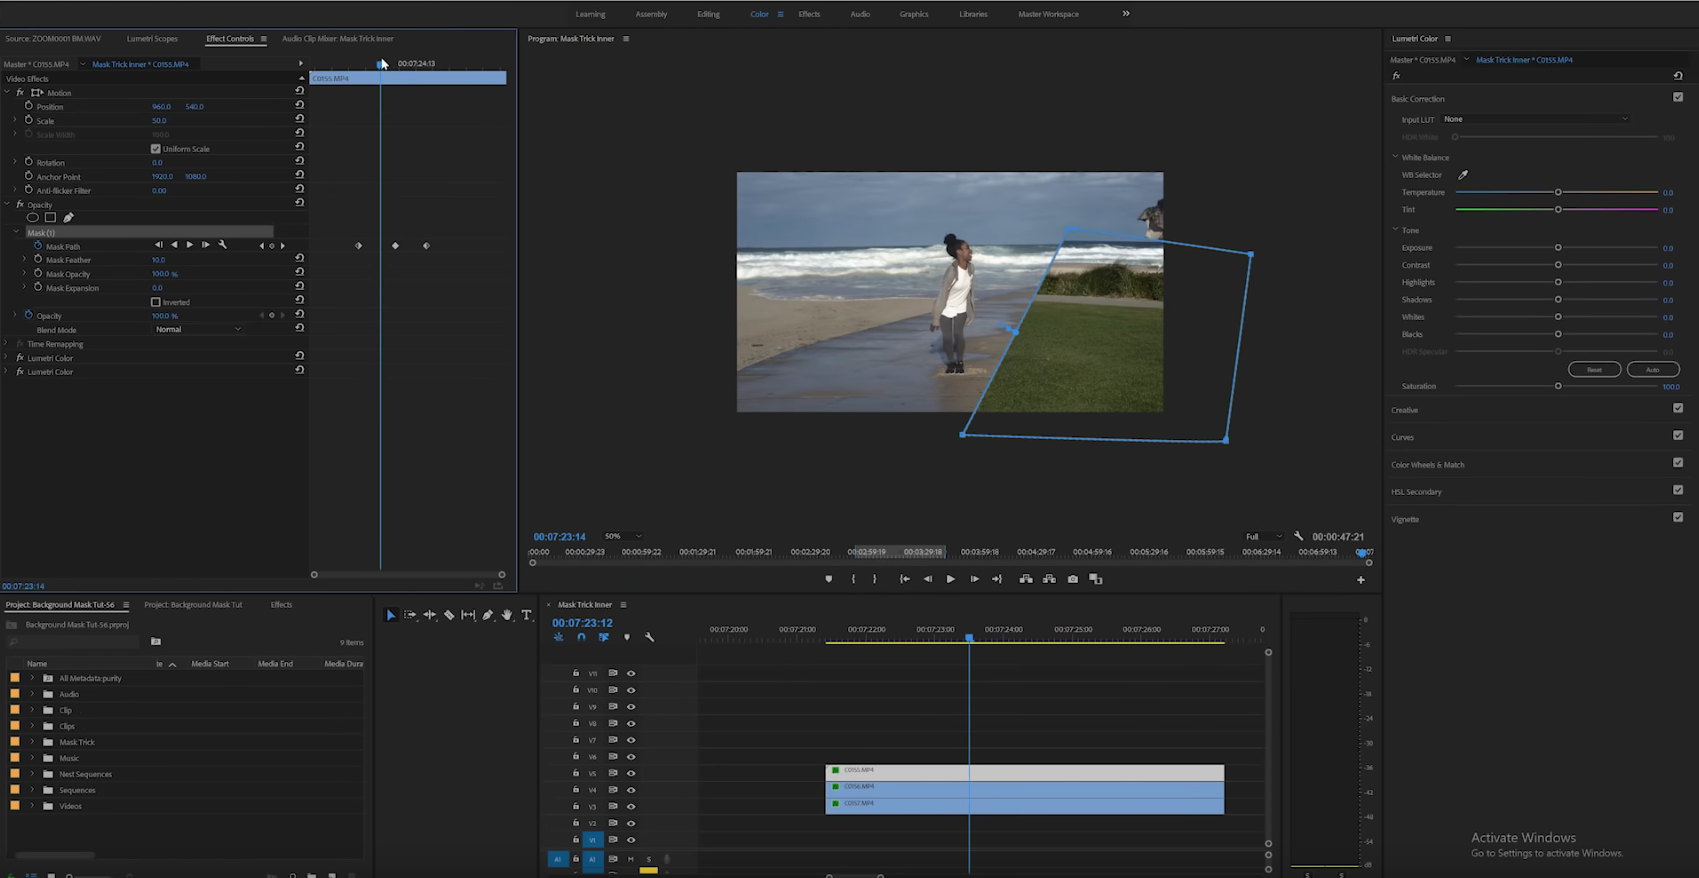
You can then keyframe the shape by clicking on the stopwatch icon next to ‘Mask Path.’ (1:24 sec in the video tutorial). You can use as many keyframes as you want, and keyframe the shape, so it moves over the layer below it.
Pro Tip: You want to make sure that all your clips are timed in the same way. So if someone is jumping up and down, make sure that their jump is timed at the exact same time in all clips. That way, when you mask off of the other clip, the participant in the foreground is in the exact same position in all clips that you’re using, so it’s only the background that’s changing.
Step 4: Share Your Work
And there you go an easy effect that’ll make someone look twice when they see it. If you do end up using this tutorial to create something you’re proud of, upload it to Instagram and tag me (madebyolufemii) in the description so I can take a look.
Like this tutorial and want to learn more? Check out my other article 15 MUST-WATCH PREMIERE PRO TUTORIALS 2018.
Thanks so much for reading this tutorial, guys, and as always, keep it chill.